 JLoom
JLoom
Overview
Introduction
Commands
Hello World Examples
Installation / Usage
Eclipse Plugin
Download
|
|
Eclipse Plugin |
|
Installation
The plugin is shipped in the new Eclipse plugin format (a single jar file - requires Eclipse 3.1 or above). This makes install/uninstall/handling very easy.Just download the plugin (called net.gereon.jloom_x.x.x.jar) and copy it in your eclipse plugin directory, e.g. /eclipse/plugins when /eclipse is your Eclipse installation directory. You have to restart Eclipse.
Activation
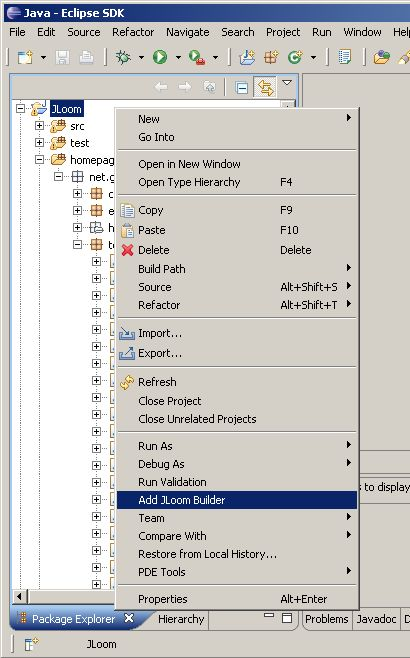
To use the plugin in a project you have to activate the JLoom Builder:In the Package Explorer get the context menu of the project root node (right mouse click), then choose "Add JLoom Builder" (should appear as context menu entry when the plugin is installed):
|
|
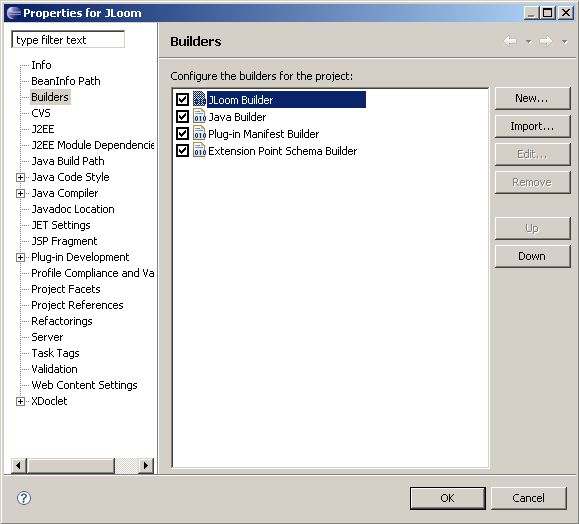
Now a new builder "JLoom Builder" should appear in the project properties:
|
|
Add Library JAR
To make the JLoom API available, you have to add the JAR library to your project:Choose Project->Properties, then in "Java Build Path" choose the tab "Libraries", then add the plugin-JAR-file with "Add JARs...".

You should choose the plugin-JAR - not the binary-JAR,
because the plugin-JAR will make the sources and JavaDoc visible in Eclipse.
|
Usage
There is no special JLoom wizard so far; to create a new JLoom template simply choose New->File in the menu and name it <template-name>.jloom.

You have to create the JLoom template in a source folder.
|
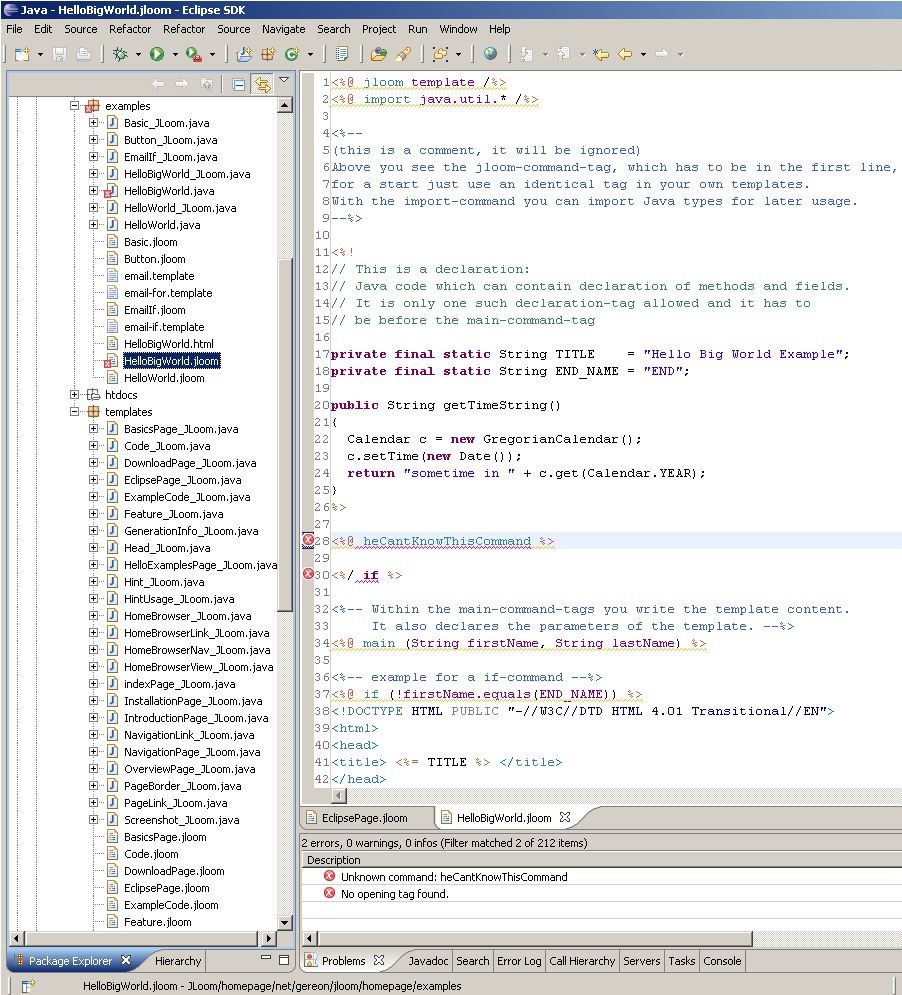
When you save a file with extension .jloom in a source folder, the builder will translate it to a file called <template-name>_JLoom.java in the same folder, this is the generation class.
Syntax errors will be shown in the editor and in the problems tab. If syntax errors don't show up, try to adjust the filters of the problems tab.
Syntax Highlighting
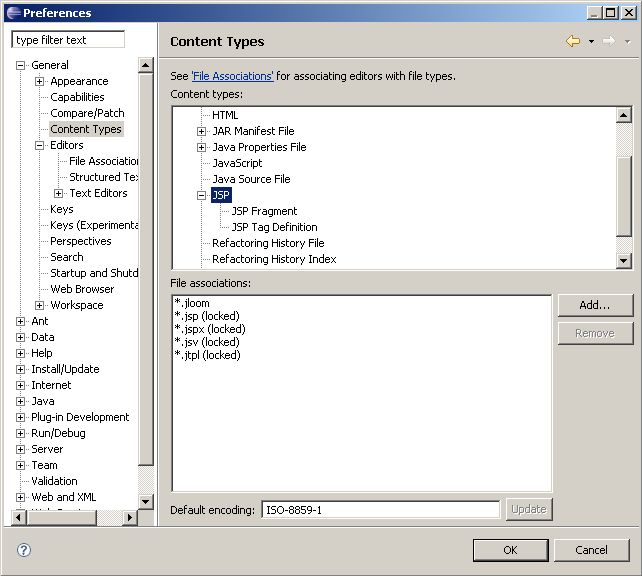
So far the plugin doesn't support syntax highlighting itself. But there is a simple workaround, especially useful if you generate HTML content. Because the syntax of JLoom is very similar to JSP, you can just use a JSP editor. For example, I use the Eclipse Web Tools Platform (WTP):

|
To associate the JSP editor with JLoom templates, you have to edit the JSP content type:
 JLoom
November 29, 2007
•
You can view the template here:
EclipsePage JLoom
November 29, 2007
•
You can view the template here:
EclipsePage
|
|


